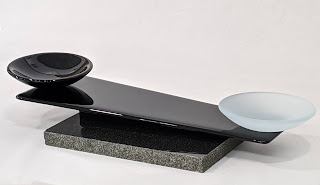
Fused Glass Fern Platter
 |
| Fused glass fern platter, Dana Worley |
Several months ago I made a fused glass fern platter. I had almost forgotten that I took pictures along the way, with the intent of creating a short tutorial. So without further delay, this post shows how I used Creative Paradise's Fern texture tile to create a hand-painted (yet simple) platter with a lot of appeal.
Supplies
Unique Glass Color NT Paints: Leaf green, dark green, and warm brown
Powdered frit: Clear, yellow, and dark green
Two 12 1/4 x 6 7/8" sheets of clear glass
DT11 Fern Tile (Creative Paradise)
GM85 mold (Creative Paradise)
Directions
 |
| Use the texture tile as a guide for applying paints |
Place the texture tile on your work surface, and then place one sheet of the clear glass on top of the tile. Using the texture tile as your guide, begin by painting the stem of the ferns with the warm brown Unique Glass Color paint (mixed as directed by UGC). Continue by painting some of the fern fronds with the dark green UGC paint, followed by painting the remaining fronds and the fiddleheads with the leaf green paint. Set aside to dry.
 |
| Set aside painted tile to dry |
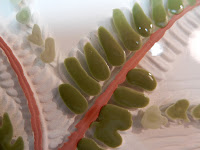 |
| Close-up of painted fronds |
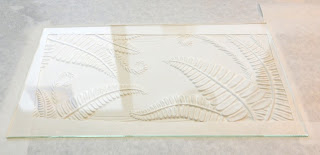 |
| Use the texture tile again as a guide for powders |
Place the second sheet of clear on top of the texture tile. Notice that I've put paper down on my work surface. I like to do this when working with powders so that I can more easily clean up (and recapture) any powder that doesn't end up on the glass.
Remember! Always wear a proper respirator when working with and cleaning up glass powders.
 |
| Use green powder as a background color for the fronds |
Use a sifter filled half-way with green powder to cover the areas where the ferns will be to provide a background for them. You can use a commercial sifter made for powders, but an individual serving-sized tea ball with a handle works great.
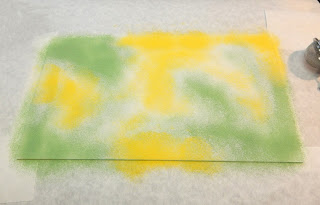 |
| Be mindful of reactions when applying the yellow powder |
Cover the areas of the background with the yellow powder. Keep in mind the potential reactions that can occur when laying down the powders. Greens typically contain copper and yellows contain sulfur. You can potentially end up with a dark color you don't want where the two colors touch, especially if you put down heavy layers of opal powder. If you look closely at the picture, I've used clear powder to act as a barrier between the two colors to avoid these reactions.
 |
| Layup: Texture tile, clear sheet with powder & painted clear |
Place the clear glass with the painted ferns on top of the powder-covered clear base, which is on top of the texture tile, and you are ready to fire.
I quite often fire my texture tiles with a large mixed load of other fused glass pieces, though this kiln load was mostly filled with texture tiles. Following is the schedule that I used, which accommodated all of the pieces in the firing.
 |
| In the kiln and ready to fire |
|
Seg
|
Rate
|
Target
|
Soak
|
|
|
1
|
300
|
1100
|
30
|
|
|
2
|
50
|
1250
|
60
|
|
|
3
|
500
|
1460
|
15
|
|
|
4
|
1500
|
950
|
90
|
|
|
5
|
100
|
700
|
00
|
After the first firing, I slumped the piece in Creative Paradise's GM85 Large Rectangular sushi mold. Check out the bottom of this post for additional pictures of the platter.
I hope this short tutorial has inspired you to consider how you can use a few simple supplies and texture tiles to create beautiful fused glass pieces.
Happy Fusing!
Dana
Resources
- Creative Paradise http://www.creativeparadiseglass.com/
- Unique Glass Colors http://uniqueglasscolors.com/
- Interested in the Koi platter on the bottom right? See this blog post: http://jestersbaubles.blogspot.com/2015/08/fused-glass-koi-platter.html
- I use System 96 glass for all my fusing: http://system96.com/
- Want to learn more about glass fusing? Bullseye's Educational Videos are a great resource! Click on the banner below for additional details.
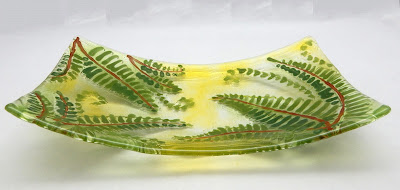 |
| Fused glass fern platter |


