Fused Glass Design Elements - Glass Combing
 |
| Fused glass bowl with combed design |
I have taken several classes where glass combing has been a small portion of the class, but this year at the Glass Craft and Bead Expo I had the opportunity to take a day-long class dedicated to combing with Janine Stillman. Janine is a great teacher, and the class was a catalyst to get me thinking about creating intentional designs with combed pieces. I've spent some time experimenting with combing the last several weeks, taking pictures along the way, so I thought I would share some of the results in a blog post.
Typically glass combings are done by cutting strips of glass and laying these strips on edge to be combed. I have done combings this way, and I've also done some pieces where at least a portion of the glass has been larger pieces of glass, stacked instead of placed on edge, with the idea that these larger pieces were background glass and would be uncombed. My experiences have taught me that strips or smaller pieces of glass are better for combing. I have experienced pinhole-sized bubbles with the combings I've done with larger pieces of glass. The bubbles did not significantly detract from the piece, but I would have preferred not to have them at all. Using strips or smaller pieces of glass ensures air has a chance to escape, thus avoiding bubbles.
 |
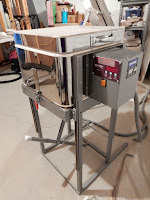
| Cress GK2 drop-bottom kiln |
Warning: Follow safety precautions when combing glass! Always turn off the kiln. Wear IR eye protection (a face shield is recommended). Wear non-flammable clothing (cotton -- no synthetics, long sleeves, long pants, closed toe shoes). Tie back long hair. Wear heavy-duty, non-flammable gloves. Comb with a partner. This is not an all-inclusive list of the precautions that should be observed when working with extremely hot glass in an extremely hot kiln! Always follow your kiln manufacturer's recommendations.
 |
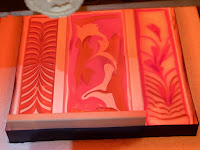
| Glass strips dammed and ready for firing |
Here is the layup for a couple of pieces that later would be used as design elements in other pieces. I was trying to optimize kiln space and firing time, so I set up three combings, separated by dams and fiber paper. The dammed pieces were laid out in a stainless steel fusing square.
 |
| Combed pieces ready to anneal |
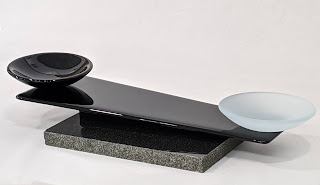
Here are the combed pieces above incorporated into completed pieces, after several more firings in the kiln.
 |
| Yellow, apple jade, orange, white |
 |
| Vanilla cream, apple jade, sea green, clear |
 |
| Dark amber, medium amber, sky blue, vanilla cream |
Here is another layup I did, using larger pieces of glass. I first drew up the design on paper, and then cut and assembled the glass in a metal fusing ring. I was using Spectrum's Vanilla Cream glass, and I wanted to include some strips to take advantage of the nice reaction achieved when the pieces are placed on edge. If you look closely at the finished piece, you'll see that the layup resulted in a few pin-hole bubbles. If I were to do this over again, I would create the design piece first and incorporate it into the background glass later to avoid the bubbles.
 |
| Glass set up in the metal ring |
 |
| Laying out the design on paper |
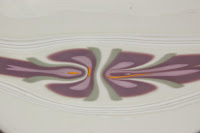
Close-up of the combing after firing:
 |
| Close-up of combing |
 |
| Finished bowl |
And here is the finished bowl after more firings and coldworking.
 |
| Celtic knot design Combing was completed in Janine's class. I incorporated it into a finished piece at home. |
Glass combing opens up a world of design possibilities in fused glass. I hope this short blog post has inspired your creativity and helped you to understand what is possible by manipulating glass in the kiln!
Dana
Resources:
Safety in the Kiln technical note, Bullseye Glass: https://www.bullseyeglass.com/images/stories/bullseye/PDF/other_technical/kiln_glass_safety.pdf
Janine Stillman, Designs by Ja9 (including information on classes): http://www.designsbyja9shop.com/Patty Gray, Glass combing instructions: http://www.pattygray.com/demo/instructions.html
Stainless rings and squares for fused glass, Bonny Doon Fused Glass: http://bonnydoonfusedglasstools.com/stainless-steel-forms/
Cress kilns, GK2: http://products.cressmfg.com/item/all-categories/glass-kilns-2/gk2?
Want to learn more about fusing? Subscribe to Bullseye Educational Videos!
 |
| Combings in the kiln ready for the final firing to slump into molds |

