Culmination of the Week's Work
 |
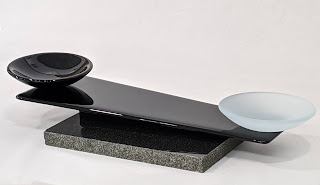
| The finished pieces in the photo tent |
Today I did a "photo shoot" so that I could get some pieces posted to my on-line shop, and also for a couple of submissions for a museum show I'm hoping to get an item in. Since I had the camera out, I thought I would share some photos of the finished pieces and a bit about the process to create those pieces.
As I posted on Facebook earlier today, I'm not certain why I make so many of my pieces in blue. Personally, I'm an "earth tone gal", but for some reason, blue glass calls my name. This week's efforts were no exception.
To help give an idea of the process involved in creating these fused glass pieces. Let's take a look at a few of them in the kiln.
 |
| Assembled in the in the kiln |
A few weeks ago I purchased Paul Tarlow's ebook "Waste Not". The book is about using scrap glass in projects. While the project to the right does not use scrap glass, I did test out one of his techniques described in the book. The finished piece is featured front and center in the picture above.

This photo also shows the brown and white bowl that appears on the right in the finished pieces photo. This bowl is three layers thick -- you'll see it's dammed to keep the glass from flowing and the size of the piece from "growing". One of the interesting experiments with this dam is that I used a few strips of Papyros firing paper (ends secured with transparent tape) to wrap the bowl, and then I finished off with a couple of layers of 1/8" fiber paper. The Papyros left a much smoother edge on the bowl than the fiber paper alone, and I didn't have to worry about my stainless steel pins that hold the fiber paper penetrating the fiber and getting into the melted glass. The Papyros is a little sturdier than traditional Thinfire from Bullseye, and it worked well in this instance.

 |
| Close up of the sushi dish pattern |
All of the items discussed in this post are now offered for sale in my Etsy store. Check them out if you are interested!
In another week and a half, I'll be heading out to the annual Glass Craft and Bead Expo being held in Las Vegas. I'm scheduled to take classes Thursday through Sunday, and I'm really excited to learn new techniques, get together with friends I've met in previous years, and meet some new glass friends. I'll be sure to post about anything fun and exciting I learn!
Until next post,
Dana