2013 Magless Exchange - Stained Glass Look
 |
| Finished "stained glass" magless |
I love the depth and interest that is created when opaque
and transparent glasses are used together. With this year's magless, I was hoping to
create a stained glass look. The idea was to use black opaque glass to frame colorful transparent pieces.
I created a pattern bar using 1 1/4" x 9 7/8" strips of opaque
black for the four sides and for spacers between the transparent layers. Each transparent square consisted of two 3/8" x 9 7/8" stacked strips. I left
6 mm spaces of no glass to allow the black glass to flow between the layers.
Here's the layup of the glass. I've drawn colored rectangles around the transparent layers to help illustrate:
 |
| Unfired pattern bar with black & transparent glass |
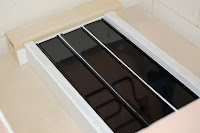
During construction, I used kiln posts to support the glass and a few drops of unscented, non-aerosol hairspray to help hold the stacked strips in place.
 |
| Kiln posts supported the glass during construction |
I needed 48 maglesses, so I created three glass stacks. In the kiln, the stacks were placed side-by-side, separated with fiber paper, and supported with glass dams and kiln furniture.
 |
| Pattern bars ready for first fuse |
Here is the firing schedule for the pattern bar slabs:
|
Seg
|
Rate
|
Target
|
Soak
|
|
|
1
|
500
|
1100
|
15
|
|
|
2
|
500
|
1475
|
30
|
|
|
3
|
1500
|
950
|
60
|
|
|
4
|
100
|
750
|
00
|
After the slabs were fused, I marked them every 1/2" with silver marker and smeared the marks with a little petroleum jelly to keep them from washing off during cutting.
 |
| Marked & ready for cutting |
After the pieces were cut, I cleaned them up with a grinder, washed thoroughly, and then fired a second time. For the second firing, I used a schedule similar to the first:
|
Seg
|
Rate
|
Target
|
Soak
|
|
|
1
|
500
|
1100
|
15
|
|
|
2
|
500
|
1475
|
20
|
|
|
3
|
1500
|
950
|
30
|
|
|
4
|
100
|
750
|
00
|
I really like the stained glass look achieved with this glass layup. I can see fusing multiple cut "chunks" together for a vase or wall sconce -- something that allows light to shine though and show off the transparent colors. I still have one slab waiting to be cut up (the three above were my second run -- I did a first run with only one pattern bar to prove the layout). Who knows what it might end up as!
Dana
See this blog post for last year's magless!

