Fused Glass Garden Stakes
 |
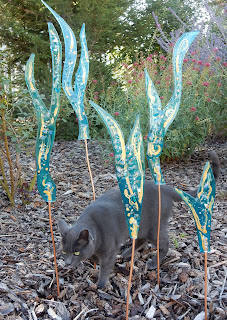
| Finished Garden Stakes |
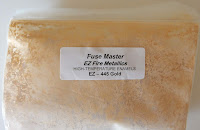
The following is a tutorial for creating fused glass garden stakes. I had a few objectives for this project. First, I wanted to try out the new Fuse Master Easy Fire Gold Metallic enamel I'd purchased. I also wanted to try my idea for mounting glass on copper tubing (nothing particularly innovative, but I wanted to see if it would work), and lastly, well... I thought I might as well make something colorful for the garden as summer is winding down.
Following is a rough outline of the steps. I apologize in advance for the poor quality photos and the black background for most pictures -- this was a "snap 'em quick" as you go kind of project!
Materials
 |
| Yes, plain old silicone |
 |
| Fuse Master Metallic Gold |
- Glass: I used most of a 16x16" sheet of Wissmach luminescent, scrap clear, some scrap dichroic, and frit
- 1/8" fiber paper
- Fuse Master Easy Fire Gold Metallic enamel
- Medium for enamel.*
- White Glue
- 1/4" OD copper tubing (hardware store)
- Copper tubing cutter (hardware store)
- GE Silicone (hardware store)
 |
| 10 ft roll of copper tubing and cutter |
Tutorial
 |
| Cut sheet glass |
Start by cutting the sheet glass into wavy shapes. I wasn't too particular -- this was a science project!
Pair off the wavy shapes and place them in pleasing arrangements. I overlapped the lower part of the glass pieces, but not the upper. I cut pieces of clear for the bottoms of each pair of shapes.
 |
| Fiber paper capped with clear top view |
 |
| Fiber paper capped with clear front view |
 |
| Add decorative paint |
 |
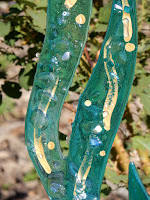
| Paint helps hide the channel |
Mix the gold metallic enamels with the medium to a painting consistency (about heavy cream) and get creative with your swirls of color. You can put some paint on the clear layer covering the fiber paper to help hide the channel once the stakes are fired.
 |
| Into the kiln and decorated with frit |
Fire these pieces to a contour fuse. The goal is to soften the frit and edges of glass so they are not sharp, while still maintaining texture.
Here's my firing schedule. You may need to adjust for your kiln.
Segment
|
Rate/Hr
|
Temp
(F)
|
Hold
|
1
|
300
|
1100
|
30
|
2
|
100
|
1250
|
60
|
3
|
500
|
1430
|
10
|
4
|
AFAP
|
950
|
120
|
-
|
OFF
|
After firing, clean up any sharp edges using a diamond hand pad or grinder (with a grinder, it is harder to get into the narrow crevices where two pieces come together). Wash the pieces well, and remove the fiber paper. I used a metal "dental hook" kind of tool to carefully pull out the pieces of fiber paper (do this while the fiber paper is wet to avoid creating airborne fiber). I stress carefully here -- you don't want to crack your glass during the process!
The pieces of fiber paper should have created nice little channels. Use the copper tube cutting tool to cut the stakes on which your glass will be mounted. I cut my pieces of tubing roughly the same length as the glass was tall. Whatever length you choose, keep in mind that some of the tubing will be placed in the ground. You need enough extra so the tubing and glass sit firmly when installed.
 |
| Crimp the tubing with channellocks |
Use a channellock wrench to flatten one end of each piece of copper tubing. The flattened area needs to be roughly the length of the glass channel created by the fiber paper.
 |
| Silicone and flattened copper tubing in the channel |
Squeeze GE Silicone into the glass channels, and insert the flattened end of the tubing. I used enough silicone to fill most of the void in the channel when the tubing was inserted.
Set the stakes aside and let them dry, undisturbed, for 24 hours.
When placing your completed garden stakes in the ground, grasp the tubing and push it in -- do not push on the glass or you risk cracking the glass channels.
 |
| Bella performs quality control on the installation. This is her garden, afterall! |
I happily met my objectives with this project. I tested out the Easy Fire Gold Metallic enamel (which I love!), I tested my idea for mounting the glass onto the copper, and I added a little fall color to the garden. Bella, however, looks a little stern... maybe she doesn't approve of the color?
I hope this quick tutorial gives you the information you need to create some beautiful glass art for your own garden!
I hope this quick tutorial gives you the information you need to create some beautiful glass art for your own garden!
Happy fusing,
Dana
Resources
- Fuse Master Easy Fire enamels and medium, I get mine at Fusion Headquarters
- Paul Tarlow's ebooks: http://fusedglassbooks.com/
- Bob Leatherbarrow's "Firing Schedules for Kilnformed Glass" (ebook)
- Bullseye Glass Educational Videos (click banner below)


