Using Fiber Paper to Make Your Own Shallow Mold
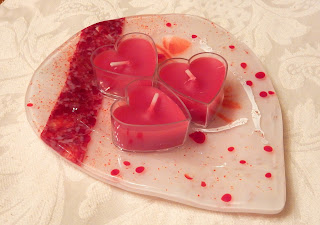 |
| Fused glass candle/soap dish |
Based on discussions I have seen on-line lately, I thought I would provide a quick tutorial on using fiber paper to create a shallow mold for fused glass. This project started when I had a leftover frit mixture from another project and thought I would create a quick candle or soap dish for a local Valentine auction. My plan was to slump it into a small square mold I have, but once fired, I felt like the piece needed something to spice it up. I decided to cut a unique shape from the glass and get creative with the slumping mold.
 |
| Fused glass project before firing |
Since Valentine was the theme, I shaped my square glass blank into a tear-drop shape. I drew the shape onto the glass with a Sharpie pen, and used my mosaic cutters to roughly cut the tear-drop shape (I was lazy and didn't want to drag out my ring-saw). Next, I took the piece to my regular grinder, first grinding with a coarse bit and then further refining the edge with a fine bit. After that, I worked the edges with diamond hand pads until smooth.
Once I had my new shape, I following the steps below to create my fiber paper mold.
 |
| Use a sharp blade for cutting the shape |
Lay out 1/8" fiber paper on top of a fabric cutting mat. Cut around the shape of the glass using a sharp, straight blade. I used a cheap plastic break-away blade that you can pick up at any hardware or "big-box" store. When cutting the fiber paper, try to cut in long, continuous cuts. You'll have a much smoother edge this way.
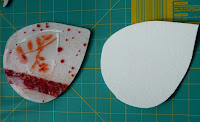 |
| A continuous cut leaves a nice clean edge |
At left is the cut piece.
 |
| Mark the inside cut with a sewing gauge |
I wanted a 2 cm edge for my dish, so I used a small sewing gauge as my guide for marking 2 cm all the way around my shape. (Strange how all my sewing tools have migrated into the glass shop!)
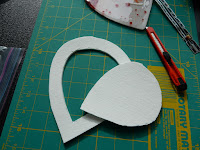 |
| Cut out the center |
Next, cut the center out of the fiber paper, once again, trying to use continuous cuts.
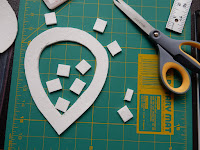 |
| Cut fiber pieces for a decorative edge |
I wanted a bit of a ruffled edge, so I cut some small squares.
 |
| Glue the pieces in place |
I placed the squares around the edge of the fiber paper mold and used a few drops of white glue to hold each piece in place.
 |
| Fire to 1260 deg F; 10 minute hold |
Into the kiln it goes! I placed my fiber mold on a kiln-washed shelf, and placed the glass on top. I fired to 1260 degrees F (hotter than I would normally slump) and held for 10 minutes.
 |
| Front of the finished candle/soap dish |
 |
| Back of the finished candle/soap dish |
Here's the finished piece, both front and back. The piece sits flatly on a table, but since it is intended as a soap or candle dish, I put rubber bump-ons on the bottom so it would not slide.
I hope you've found this write-up helpful. The process used here is basically the same as "kiln-carving" glass. If you want to learn more about kiln-carving, check out this tip sheet from Bullseye Glass, and also the links to the Educational Videos, below.
Happy fusing!
Dana
Resources:
Bullseye Video: Kilncarving
Bullseye Video, Kilncarved Sconce Project

