Using Fiber Paper to Modify a Fused Glass Mold
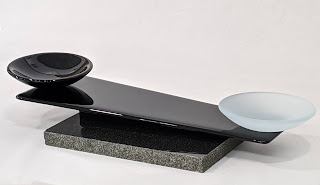
 |
| Black and white fused glass butter dish |
There's quite often no problem slumping into a mold larger than your piece of glass. However, I did have concerns about having the edge of the dish raised sufficiently so that the butter would not spill over the side of the dish if the butter melted. To get a better raised edge, I modified the mold with fiber paper. The short tutorial below shows how it was done.
Tutorial
 |
| Mold and glass piece to be slumped |
At left you can see the fused glass mold that I used, along with the piece of glass to be slumped.
 |
| Side profile of mold |
This shows a side profile of the mold. The raised edge would be fine if the glass were cut full-size. However, because the glass was smaller than the mold, I was concerned it would not be raised enough to keep melted butter from spilling over.
 |
| Use a sharp blade the cut the fiber paper |
I used a sharp blade to cut a piece of 1/4" thick fiber paper to the size of the glass. I laid the glass and fiber paper on my cutting mat (long ago stolen from my sewing supplies!) and used the glass itself as a guide for cutting the fiber paper.
Tip: For a sharp blade, you can use an Exacto knife or small box cutter.
Tip: For a sharp blade, you can use an Exacto knife or small box cutter.
 |
| The glass and the fiber paper rim that will be placed on the mold |
After cutting the outside edge, I marked a 1/4" inside my fiber paper rectangle and cut it out with the blade.
Tip: Try to cut the inside border using one continuous cut, and avoid raising the blade from the fiber paper. This will result in the smoothest inside edge.
 |
| Fiber paper rim placed on mold |
This picture shows the rim of fiber paper that was cut, placed on the mold.
 |
| Ready for firing |
The glass is placed on the fiber paper, and into the kiln it goes for the slump.
 |
| Back of slumped glass |
Here is the back of the finished piece, which shows the raised edge of the dish.
 |
| Profile of slumped glass |
And finally, here is the profile of the slumped butter dish.
I hope this quick tutorial sparks ideas about how you might modify your favorite fused glass mold to create a new and interesting shape. If you have questions, leave a comment below!
Best, Dana
Want to learn more about fused glass?
Check out Bullseye Glass's Educational Video Series! Click the Bullseye banner below for more information.