Open-Faced Glass Casting
 |
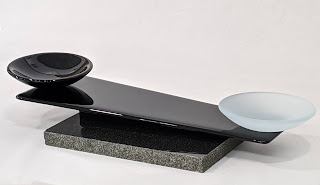
| "Standing in the Shadow of Regret" by Dana Worley, glass artist |
This process is referred to as open-faced casting. Plaster is poured over a model (quite often clay). Once the plaster is set, the model is removed and glass is kiln-cast into the plaster form. What follows is not a step-by-step tutorial, but some pictures I took when making the model.
I created the model using Plasticine modelling clay (a craft clay that does not dry out), some grape vines and leaves from our yard, and a small branch I picked up one day when I was on a walk.

I use a silicone pastry mat and rolling pin to roll out the clay (yes, kitchen tools come in handy in the studio!). This photo shows the branch sandwiched between two slabs of clay. Note that the clay is built up on the sides of the branch to avoid dramatic undercuts that might trap the glass when it is fired.

Grape vines and leaves were pressed into the clay.
The plants were removed and the branch was painted with a few coats of shellac before moving to the next step. (The shellac seals the wood, which makes removing the branch easier.)

I rolled out more clay, pressed leaves into it, and cut out the leaf shapes.
These clay leaves were placed on top of the model. I used more clay to build up some of the leaves to add dimension and created clay coils for vines.
Once the glass is fired, the raised leaves will be raised on the glass piece. The pressed in leaves and vines will create a nice, recessed surface texture.
The next step was to build a square container around the model to hold the plaster when it was poured. I formed this out of float glass and sealed the seams with more clay (as seen in the previous photo if you look closely - this was before the box was "securely" duct taped). It's odd, but I didn't get photos of what came next -- pouring the plaster over the form, one side of the box starting to collapse (not enough duct tape!), and me trying to scoop plaster up and back over the model as plaster oozed out one side. Handy tip: plaster will eventually come out of carpet if you use a hammer to crumble it.

Here's the mold after the plaster set and the clay and branch were removed. I used a Dremel to saw the wood in half, to make it easier to remove. Note that there were two small holes in opposing corners, which I was able to repair with more plaster.

Glass was cut to fit the mold. The first piece of glass in the mold was ming green irid, with irid facing the plaster.

Additional sheets of glass were placed in the mold and mold was loaded in the kiln.

The unmolded glass after firing.
The cast glass was cleaned up to remove the remaining plaster and the bottom edge was cold-worked flat.
To finish it off, the glass was epoxied onto a granite base. I'm really pleased with the finished piece. I hope you've found this post informative and inspirational!
Dana
Resources
Want to learn more about kiln-casting? Bullseye Glass has some excellent resource material - What is Kiln-Casting
Check out all of Bullseye Glass's video tutorials (small annual subscription fee). Click the banner below!

 |
| Kiln-cast glass Dana Worley, artist |